Tired of the same old science demos? Spark real wow moments.
You explain chemical change, point to a textbook diagram, and half the room looks polite while the other half looks lost. That's normal. “New substances form” is a hard idea to make concrete until students can see something fizz, darken, warm up, or turn cloudy in front of them.
That's why I keep coming back to hands-on chemical changes experiments. When students watch a liquid form a solid, feel a cup heat up, or compare a shiny nail to a rusty one a few days later, the topic stops feeling abstract. It becomes observable, discussable, and much easier to remember.
A reliable place to start is the classic set of five signs teachers use to help students identify chemical reactions: color change, odor production, temperature change, gas formation, and precipitate formation, as outlined in this classroom guide from Carleton's Science Education Resource Center. Those signs give students a practical lens for every lab that follows.
Below are eight classroom-tested mini-lessons I'd use. Each one includes grade-level fit, safety notes, differentiation ideas, and ways to use Kuraplan to cut prep time instead of spending your planning period building worksheets from scratch.
1. Acid-Base Neutralization with Cabbage pH Indicator
This one works because it feels like magic while still being easy to manage. Red cabbage juice gives you a strong visual payoff, and students quickly grasp that different substances can trigger different color changes even when they all look clear at the start.
I like this lesson for upper elementary through high school because it scales well. Younger students can sort liquids into “acid,” “base,” and “not sure yet,” while older students can connect the color shifts to ions, neutralization, and environmental testing.
How I run it
Prep the cabbage indicator the day before by boiling chopped red cabbage and straining the liquid. Then set out small clear cups with test substances such as vinegar, lemon juice, baking soda solution, and a school-approved base if your setting allows it.
Have students predict first, then test. That prediction step matters because it slows them down and makes the reveal more meaningful.
- Best grades: Upper elementary, middle school, high school honors
- Safety: Goggles are enough for most classroom versions using household acids and bases. Review tasting rules and handwashing.
- Differentiation: Give emerging readers a color chart with icons. Give advanced students unknown samples and ask them to justify their classification.
What works, and what trips students up
The main issue is that students often assume any color change means a chemical reaction. That's where a control helps. The big teaching gap in many color-change labs is helping students rule out simple mixing or dilution as the cause, not just celebrating the color itself.
Practical rule: Run one comparison cup with just water and indicator so students can see that “different color” needs interpretation, not guessing.
For quick follow-up practice, I'd pair this with Kuraplan and a ready-made chemical vs physical changes worksheet. It's a clean way to move from the fun part to the evidence-based explanation students need to write.
2. Combustion Reaction Burning Different Materials
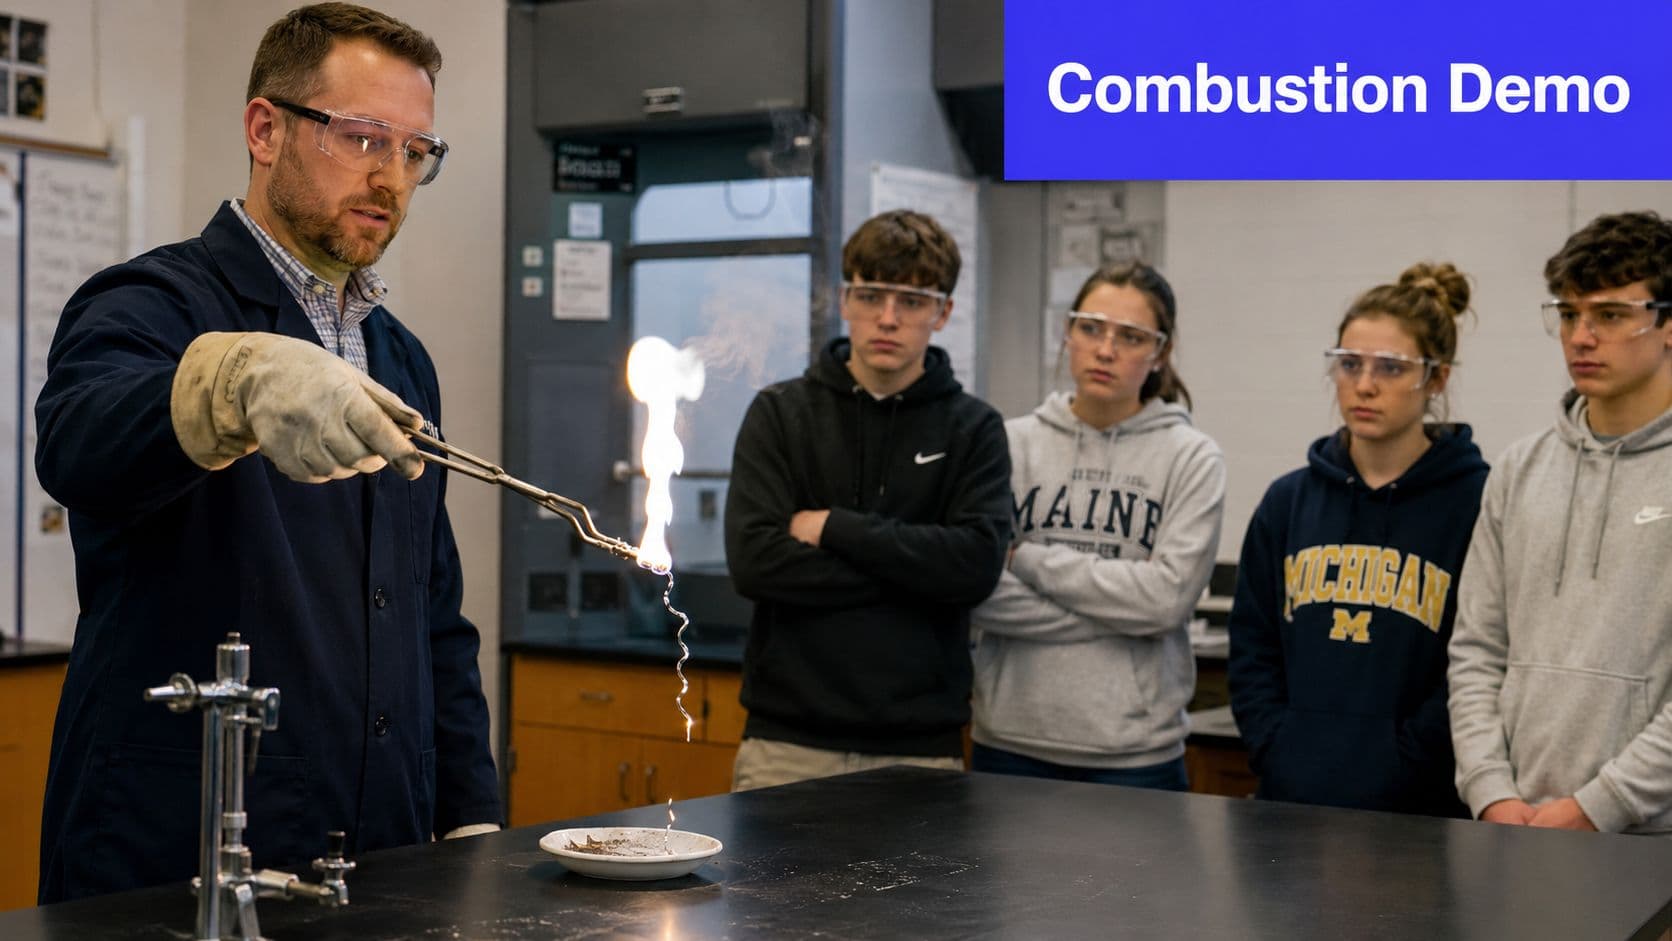
Combustion is one of the clearest irreversible changes you can show, but it's also the one that demands the most teacher control. I treat this as a demonstration, not a free-for-all lab, especially if I'm using magnesium ribbon, sulfur, or steel wool.
Students usually remember this lesson because each material behaves differently. Wood chars, paper flashes, steel wool glows, and magnesium produces a dramatic bright burn. That contrast helps them see that “burning” isn't one generic event. It's a class of reactions with different visible products.
How to make it land
Dim the lights slightly, but keep the room bright enough for safe observation and note-taking. I also pre-burn each material ahead of time so I know the timing, smoke level, and visibility for my specific room setup.
Ask students to sketch what they see instead of only writing adjectives. Sketching slows observation down, and it helps quieter students contribute more precise details.
- Best grades: Upper elementary as demo, middle school honors, high school chemistry
- Safety: Teacher-led only unless your lab setup and district procedures allow otherwise. Use goggles, ventilation, and proper storage such as find acid chemical storage and other approved lab safety systems.
- Differentiation: Let some students focus on visible evidence, while advanced students discuss oxidation and product formation.
The best discussion question
Ask where the mass “went” after something burns. Don't rush that conversation. It's one of the easiest ways to move students past “it disappeared” thinking and into real chemical reasoning about gases and products leaving the visible solid.
Students don't need every equation memorized to understand combustion. They need to notice that the starting material and the ending material are not the same thing.
Kuraplan is useful here for a safety checklist and post-demo observation sheet. For this lesson, I'd want a printable page with sentence stems like “I know a chemical change occurred because…” so every student leaves with a written claim backed by evidence.
3. Precipitation Reactions Mixing Solutions to Form Solids
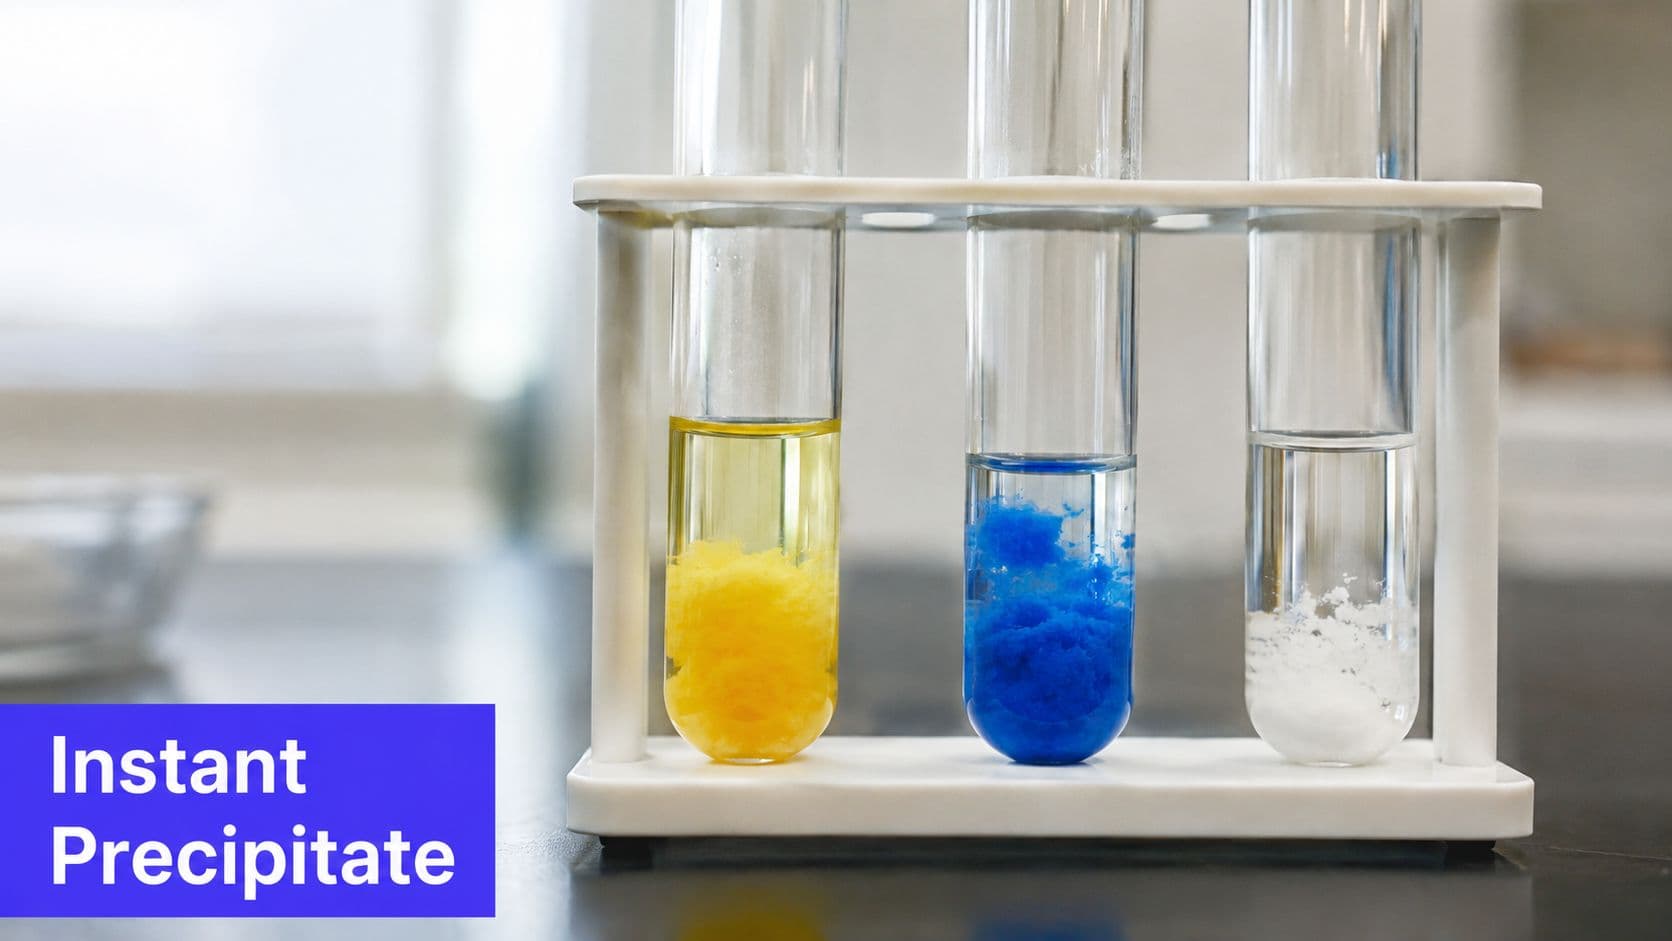
If you want instant payoff without flame or smell, do a precipitation lab. Two clear solutions go in, and suddenly students get a cloudy mixture or a visible solid. That's about as concrete as chemistry gets.
This lab works especially well in middle school because it looks simple but opens the door to deeper ideas. Students can start with “a solid formed” and later learn that ions in solution rearranged to make a new compound that doesn't stay dissolved.
Setup that keeps it organized
Use labeled dropper bottles or squeeze bottles and a reaction chart. Without a chart, students mix randomly, forget what they combined, and you lose half the learning in the cleanup.
I prefer small clear cups or test tubes in a rack. The smaller volume keeps waste down and makes the precipitate easier to compare across trials.
- Best grades: Middle school, high school chemistry, environmental science
- Safety: Goggles, gloves if required by your materials, and a clearly labeled waste container
- Differentiation: Give some groups a completed matrix to fill in. Let advanced students write word equations or balanced equations.
Where students need support
Students often say “it turned white” or “it got cloudy” and stop there. Push them to name the stronger evidence. Did a solid appear where there wasn't one before? Did it settle? Could it be filtered?
That precision matters because precipitate formation is one of the five standard signs teachers use to identify a chemical reaction. It also connects beautifully to later work on equation writing, so I like linking this lesson to Kuraplan's balancing chemical equations worksheet once students are ready for the symbolic side.
4. Rusting and Oxidation The Iron Nail Experiment
Not every strong chemistry lesson needs instant drama. Rusting is slow, and that's exactly why it's useful. Students learn that a chemical change doesn't have to happen in front of them in thirty seconds to be real.
Set up several jars with iron nails in different conditions, such as plain water, salt water, oil-covered water, dry air, and boiled water. Then leave them alone long enough for patterns to emerge. The waiting becomes part of the lesson.
Why this lesson is worth the extra days
Students compare conditions instead of just watching one sample rust. That comparison turns the activity into an investigation. They begin to see that oxygen and water matter, and that barriers like oil can slow the process.
Take photos as the jars change. Daily sketches are fine, but photos help students notice subtle shifts in color and coverage that they might miss from memory.
- Best grades: Elementary for observation, middle school for variables and graphing, high school for redox discussion
- Safety: Low hazard, but still use goggles and clear handling routines
- Differentiation: Some students can record simple visual notes. Others can write explanations using oxidation vocabulary and compare rates across conditions.
One detail students remember
Boiled water is a great comparison condition because it helps students think about dissolved oxygen. Even if they don't master the chemistry on day one, they see that different setups matter.
For standards-aligned extension, Kuraplan can turn the daily observation notes into a structured packet. If you teach older students, its oxidation-reduction standard support is a practical way to build from rust observations into formal redox language without writing every prompt yourself.
5. Exothermic Reactions Mixing Acids and Bases with Temperature Change
Students love this one because chemistry suddenly becomes something they can feel. A container warms in their hands, and that sensory moment makes the idea of energy transfer stick much better than a lecture slide ever will.
For most classrooms, I'd start with a safer household version before moving to stronger lab chemicals. Vinegar and baking soda are accessible, familiar, and easy to discuss, even if the temperature effect can be subtler than students expect.
The teaching move that matters most
Have students take a starting temperature, watch for the highest or lowest point, and record how long the mixture takes to settle back. Without that structure, they'll say “it changed” but miss the evidence.
This is also the right place to introduce the broader idea that chemical changes can involve energy moving into or out of the system. Don't let students reduce chemistry to “stuff changes color.”
- Best grades: Middle school, high school chemistry, cross-curricular physical science
- Safety: Goggles always. If you use stronger acids or bases, follow your school's approved handling procedures and storage practices. For related classroom and lab organization, it helps to review unique mineral specimens only as enrichment, not as a handling model for reactive chemicals.
- Differentiation: Some students can graph temperature over time. Others can focus on a claim-evidence-reasoning paragraph.
What students often misunderstand
A lot of students think “warm” means “physical change” because they associate heat with touching or mixing. Slow them down and ask what caused the heat. If the temperature changed because new substances formed through reaction, that's strong evidence of chemical change.
Kuraplan is handy here for a lab sheet with a built-in temperature table and sentence starters. That kind of support matters, especially when you want students writing explanations instead of just circling “exothermic” and moving on.
6. Decomposition Reaction Hydrogen Peroxide and Yeast Catalyst
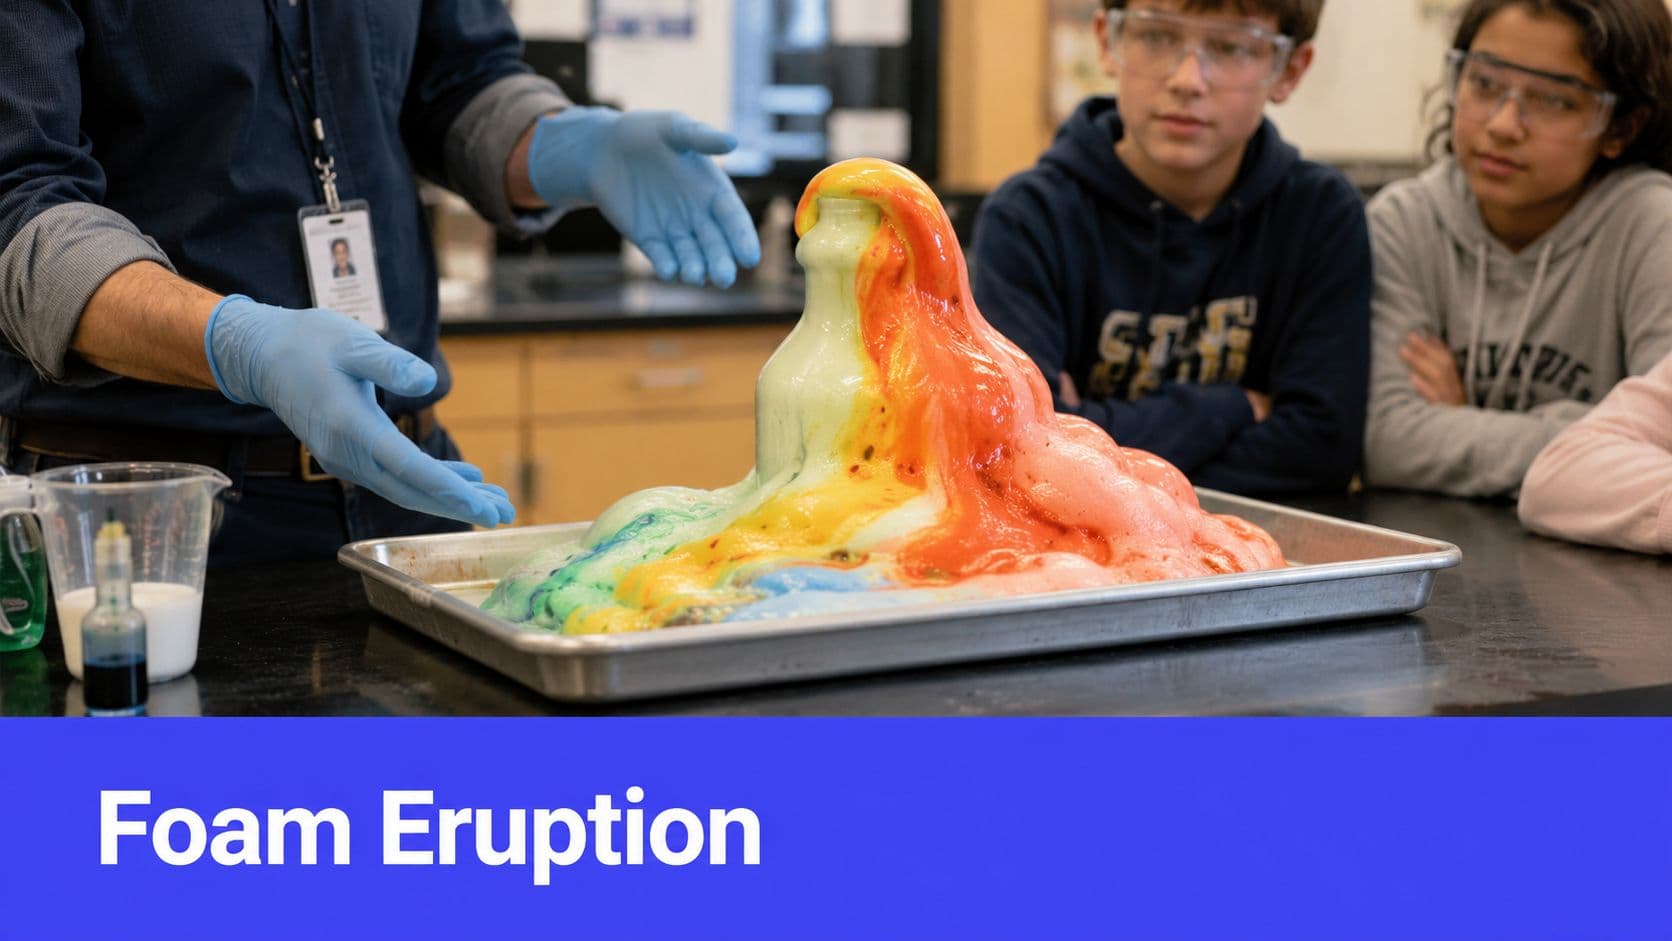
This is the foam eruption students talk about long after class. It's messy in the best way, but only if you set the boundaries first. Put the reaction vessel in a tray, keep goggles on everyone, and decide before class whether students will rotate through stations or watch a demonstration.
The chemistry is useful because more than one big idea shows up at once. Students see gas production, feel temperature change, and learn that a catalyst can speed a reaction without being used up in the same way as the reactants.
How to keep the “wow” tied to science
Use dish soap and food coloring if you want the visual payoff, but don't let the color become the whole lesson. Instead, the evidence is the rapid release of oxygen gas and the change in the original hydrogen peroxide solution.
Ask students why the bottle of peroxide doesn't usually erupt on the shelf. That question leads naturally into reaction rates and catalysts.
- Best grades: Elementary as demo, middle school lab, high school catalyst discussion
- Safety: Use school-approved peroxide concentrations and protective equipment. Keep the setup in a tray.
- Differentiation: Younger students can focus on observations. Older students can explain the catalyst's role and compare catalyzed versus uncatalyzed change.
Good extension if you have time
If your materials and safety setup allow it, capture some gas in a balloon and test it with a glowing splint demonstration. Students immediately connect the bubbles to a real gas, not just “foam.”
Classroom reminder: The foam looks wild, but the strongest writing comes from asking what changed chemically, not from describing how tall it got.
Kuraplan can generate vocabulary cards for catalyst, decomposition, and gas evolution. That's especially useful when you're trying to support mixed readiness levels in the same room.
7. Color-Changing Reactions Iodine-Starch Indicator Test
A student swabs a piece of potato, adds iodine, and the surface turns blue-black almost at once. Few labs get faster buy-in than this one. It works well in a collection of mini-lesson plans because the setup is light, the materials are inexpensive, and the follow-up discussion can be scaled from upper elementary through introductory high school chemistry.
My go-to version is simple. Put water in a clear cup, add iodine solution, then add cornstarch, or test small food samples such as bread, crackers, rice, or potato on a tray. Students get an immediate result, which saves time on a busy lab day. The trade-off is that the visual can pull attention away from the science unless the questions are tight.
How to teach the color change accurately
I treat this as an indicator lesson first and a chemical change discussion second. That keeps students from overgeneralizing that any color shift proves a new substance formed. In this lab, the stronger teaching point is that iodine helps reveal the presence of starch.
That distinction matters.
I usually ask students to sort foods into three groups before testing: likely contains starch, unsure, and likely does not contain starch. Bread and potato usually give students confidence. Sugar is useful because many students predict it will behave the same way, then have to explain why it does not.
- Best grades: Elementary, middle school, introductory high school chemistry
- Safety: Use goggles and protect tables because iodine stains skin, clothing, and surfaces
- Differentiation: Give younger students picture cards and a simple prediction chart. Ask older students to explain the difference between an indicator response and stronger evidence of a chemical reaction
A question that improves the writing after the lab
Ask, “Did the iodine make starch appear, or did it show that starch was already present?” Student answers get much clearer when that question is part of the conclusion. It pushes them past “it changed color” and toward evidence-based reasoning.
For mixed-readiness classes, Kuraplan is useful for generating a ready-to-print prediction sheet, labeled food visuals, and a short CER-style response page. I add one prompt that asks students when a color change is useful evidence and when it needs more support. That small revision turns a quick demo into a complete mini-lesson plan.
8. Crystal Growing Reaction Supersaturated Solutions
Crystal growth slows the pace down, which is useful after several quick-payoff labs. Students set up the system, wait, observe, and come back to something that has visibly changed over time. That patience is good for them.
I use salt or sugar depending on the grade level and whether I want the food science connection. The visual appeal is strong, especially when students use a string, pipe cleaner, or stick as a nucleation site.
What students learn while they wait
This lesson opens up a rich discussion because crystal formation can confuse students. It looks dramatic, but it isn't the same kind of evidence as gas production or a precipitate from two reacting solutions. That makes it a good lesson for comparing physical and chemical change claims.
A second strong angle is conservation of mass. When I want students to think carefully about matter in closed systems, I connect the discussion to classroom examples highlighted by The Science Penguin's conservation of mass ideas, including Lavoisier's 1789 law and closed-system activities teachers use to show that matter isn't lost when substances change.
Here's a useful visual if you want students to see the setup before they start.
Practical setup notes
Keep the containers in a stable place and cover them loosely. If students keep picking them up, bumping the table, or moving them to the windowsill every class period, the results are usually weaker and less consistent.
- Best grades: Elementary through high school
- Safety: Very manageable with salt or sugar solutions, but hot water still needs teacher oversight
- Differentiation: Younger students can sketch growth daily. Older students can discuss solubility, saturation, and why ordered structures form as conditions change.
Kuraplan is particularly helpful for this lab because students need an observation journal more than a single worksheet. A day-by-day template with space for drawings, notes, and predictions saves a lot of prep.
Comparison of 8 Chemical Change Experiments
| Experiment | Implementation Complexity 🔄 | Resource Requirements ⚡ | Expected Outcomes ⭐📊 | Ideal Use Cases 💡 | Key Advantages ⭐ |
|---|---|---|---|---|---|
| Acid-Base Neutralization with Cabbage pH Indicator | Low, simple extraction prep (prepare 24 h ahead); scalable demo or stations | Low, red cabbage, cups, household acids/bases, optional pH chart | Vivid color shifts across pH; qualitative pH understanding; not highly precise | Intro to pH, classroom demos, inquiry stations (Grades 3–12) | Engaging, safe, low-cost, clear visual evidence of neutralization |
| Combustion Reaction: Burning Different Materials | High, teacher-led only; strict safety controls and ventilation | Moderate, burners, heat‑resistant tools, PPE, fume hood recommended | Dramatic flames, heat release, residual ash; clear irreversible chemical change | Large-group demos on energy release, oxidation, HS chemistry | Memorable sensory impact; demonstrates exothermic reactions and irreversibility |
| Precipitation Reactions: Mixing Solutions to Form Solids | Low–Moderate, prepare solutions; easily done at stations with supervision | Low, common salts/solutions, droppers, clear cups; proper waste disposal needed | Instant colorful precipitates; clear evidence of new insoluble solids; reproducible | Ionic bonding, solubility labs, middle–high school inquiry activities | Quick, student-friendly, multiple variations for pattern discovery |
| Rusting and Oxidation: The Iron Nail Experiment | Low, simple setup but multi-day observations and consistent storage | Very low, nails, jars, water, salt, oil; labels and photo documentation | Slow development of red-brown rust; illustrates reaction rates and redox | Long-term investigations, controlled-variable experiments, corrosion topics | Teaches rate concepts, real-world relevance, safe and inexpensive |
| Exothermic Reactions: Mixing Acids and Bases with Temperature Change | Low–Moderate, simple with household materials; stricter protocols for strong reagents | Low–Moderate, vinegar/baking soda or dilute acids/bases, thermometers, PPE if concentrated | Measurable temperature increase; demonstrates energy transfer in reactions | Thermodynamics intro, data-collection labs, middle–high school | Quantifiable, multisensory, directly links chemistry to energy concepts |
| Decomposition Reaction: Hydrogen Peroxide and Yeast Catalyst | Low, quick setup; scalable demo or student activity with containment | Low, H2O2 (food‑grade), yeast/catalyst, soap, tray; PPE for higher concentrations | Vigorous foaming and gas release; clear catalyst effect speeding reaction | Catalyst/rate demonstrations, engaging demos K–12 | Highly engaging "volcano" effect; safe with appropriate concentrations; teaches catalysts |
| Color-Changing Reactions: Iodine-Starch Indicator Test | Low, immediate, simple mixing; quick stations possible | Low, iodine solution, food samples, gloves/aprons; ventilation advised | Immediate blue‑black color with starch; qualitative detection of specific compound | Qualitative analysis, food chemistry, indicator lessons K–12 | Fast, clear results; connects chemistry to everyday foods and testing |
| Crystal Growing Reaction: Supersaturated Solutions | Low, straightforward setup but requires days–weeks of undisturbed growth | Very low, salt/sugar, hot water, containers, string, stable storage space | Slow formation of visible crystals; teaches solubility, saturation, structure | Long-term projects, solubility lessons, cross‑grade displays | High student investment, reusable artifacts, safe and illustrative of molecular arrangement |
Making Chemical Changes Stick
Monday, period two. Students have already seen foam, color shifts, and a beaker that warmed up in their hands, but the written conclusion still says, “A chemical change happened because it looked different.” That gap between seeing and explaining is the part worth teaching on purpose.
These eight experiments work best as short, complete mini-lessons, not isolated demos. Each one gives students a specific kind of evidence to name: temperature change, gas production, precipitate formation, oxidation, or a new color tied to an indicator. When the lesson plan also includes grade-band adjustments, safety notes, and a simple recording sheet, students do a better job of connecting the observation to the reaction.
I sequence them from fast feedback to slower proof. Cabbage indicator, iodine-starch, and precipitation reactions get early buy-in because students can see results right away. Rusting and crystal growth come later, once the class has enough practice to stay patient, collect observations over time, and defend a claim with more than one clue.
That pacing saves time, too.
Students stop treating every color change as automatic proof. They start asking better questions. Did a gas form, or did we just trap air? Did a solid appear because of evaporation, or because a new substance formed? Those are the habits that make chemical changes stick past quiz day.
The planning load is real in a busy classroom. Teachers still have to prep materials, adjust for mixed readiness levels, print lab sheets, and keep safety directions clear enough that students can work with some independence. Schools are also putting more attention on digital planning support. The chemicals digitalization market was valued at USD 14.83 billion in 2023 and is projected to reach USD 60.13 billion by 2030, with a projected CAGR of 28.6% (Grand View Research's chemicals digitalization market report). In practice, that often looks less dramatic than the market language suggests. It means using tools that help teachers build cleaner visuals, differentiated prompts, and ready-to-print materials without remaking the same documents every term.
Kuraplan works well for that part of the job. If the experiment is already chosen, it can help turn it into a worksheet, lesson outline, visual aid, or exit ticket quickly. For this set of eight labs, that matters because the value is in the full mini-lesson plan: matching the activity to grade level, tightening the safety language, and giving students just enough structure to record evidence well.
I've found that one repeated question helps across the whole unit: What is the evidence that a new substance formed? Use it in every lab, even when the reaction looks completely different from the last one. That consistency gives students a frame they can reuse, and it makes class discussions sharper. For broader lab organization and storage planning, it's worth reviewing proper chemical containment options alongside your school's own safety procedures.
If you want to turn any of these labs into ready-to-teach materials, try Kuraplan. It's a practical option for creating standards-aligned lesson plans, worksheets, visuals, and assessments without spending your evening formatting documents by hand.