
A unit plan is so much more than a collection of daily lessons. It’s the roadmap for a cohesive learning journey, a multi-week arc that ties together learning goals, assessments, and activities around a central theme. The whole point is to make sure your day-to-day instruction is building toward something big: the mastery of key standards and skills.
Conquering the Sunday Scaries of Unit Planning
We’ve all been there. That creeping Sunday afternoon dread when you realize you have a massive unit to map out. You need it to be engaging, hit all the right standards, and somehow work for a classroom full of wildly different learners. For too long, unit planning has felt like a rigid, box-checking exercise that kills creativity before it even starts.
This guide is about reframing that process. Let’s move beyond the tired templates and think about unit planning as designing a genuine learning experience. It's about building a flexible framework that actually supports you and your students, not just satisfying an administrative checklist. We’re going to swap that blank-page anxiety for a clear, actionable process.
To give you a quick preview, here are the core components we’ll be breaking down.
The Core Components of an Effective Unit Plan
This table gives you a quick-glance summary of the essential pillars we'll cover in this guide to build a successful unit.
| Component | What It Is | Why It Matters for Teachers |
|---|---|---|
| Learning Goals & Standards | The "what" and "why" of your unit—the key skills and knowledge students will gain. | Keeps your instruction focused and ensures you're meeting curriculum requirements. |
| Assessments | How you'll measure student learning, both at the end (summative) and along the way (formative). | Tells you if your teaching is working and who needs more support. |
| Lesson Sequencing | The logical flow of lessons that builds skills and concepts from simple to complex. | Creates a coherent learning path instead of a series of disconnected activities. |
| Differentiation | Strategies to support struggling learners and challenge advanced students. | Ensures every student in your classroom has a real chance to learn and grow. |
These are the building blocks. Get them right, and the rest of the unit falls into place.
The Problem With Old-School Unit Plans
So why does traditional unit planning often fall so flat? It usually forces a linear, top-down approach that just doesn't work in the messy reality of a real classroom.
- It starts with activities, not outcomes. Many templates push you to list daily activities first. It’s an easy trap that makes you lose sight of the actual learning goal.
- It’s way too inflexible. A rigid pacing guide has no answer for the surprise fire drill, the impromptu school assembly, or that one concept your class really needs to spend another day on.
- It treats all students the same. A one-size-fits-all plan almost always fails to meet the diverse needs in your room, from kids who need extra support to those who are ready to fly.
A huge part of conquering the 'Sunday Scaries' is thinking ahead about creating a productive learning environment from day one of the unit. When your classroom culture supports curiosity and risk-taking, the lessons themselves become infinitely more powerful.
The goal isn't to perfectly script every minute of the next four weeks. It's to build a reliable roadmap that gives you the confidence to navigate the journey, detours and all.
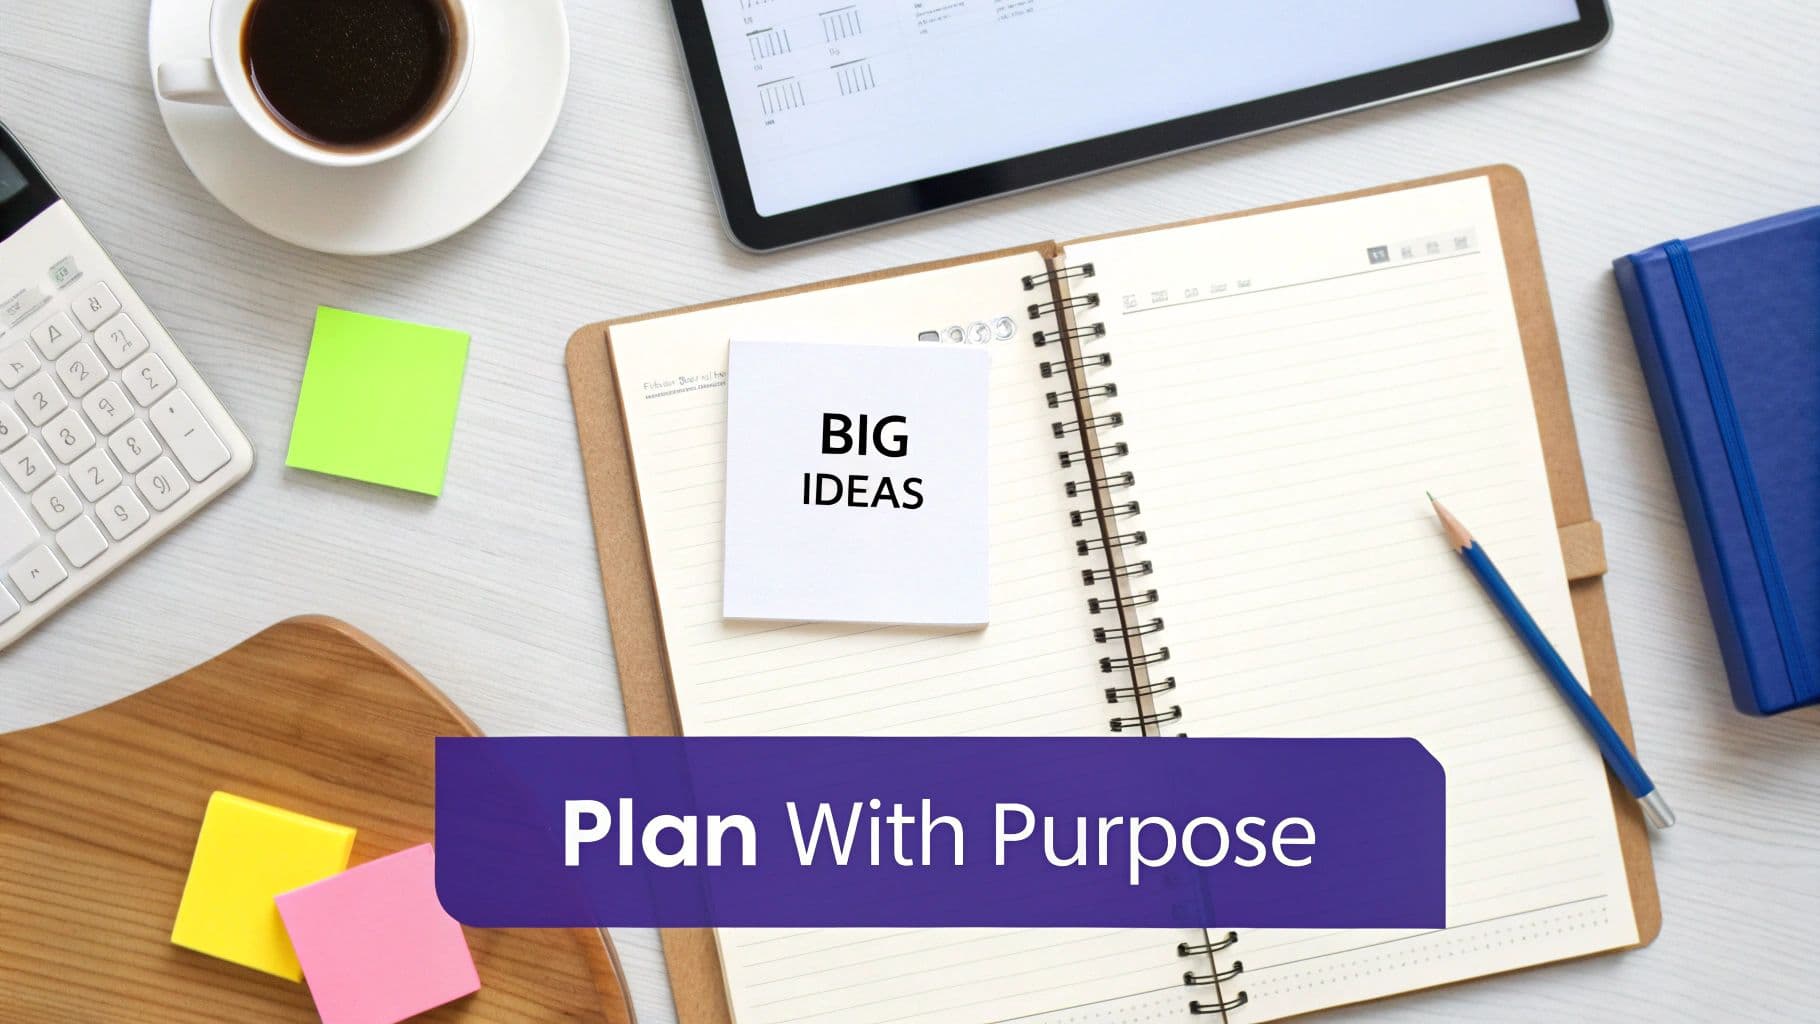
Starting With Big Ideas
Forget staring at a blank calendar. The real first step is to define the 'big ideas' of your unit. These are the core concepts, the essential understandings you want students to carry with them long after the final test is graded.
Think less about "listing the three causes of the Civil War" and more about "understanding how deep-seated conflict can shape a nation's identity for generations." See the difference?
When you start here, every other part of the process—from sequencing lessons to designing assessments—suddenly feels more intuitive and a lot less like a chore. By grounding your entire plan in these powerful, essential ideas, you guarantee that every single activity has a clear and compelling purpose.
Starting With the End in Mind Using Backward Design
"Backward design" might sound like another buzzword from a stuffy PD session, but I promise it's the single most powerful shift you can make in your unit planning. The idea is refreshingly simple: instead of starting with Week 1, Day 1, you begin by defining exactly where you want your students to end up.
You decide on the final destination first, then you build the roadmap to get them there.
This approach forces every single activity, worksheet, and discussion to serve a clear purpose. No more "filler" lessons that just eat up time. Every piece of your unit becomes an intentional step toward that final goal, making your instruction more focused and way more effective.
Define What Success Looks Like
Before you even think about a single lesson plan, ask yourself this one critical question: What do I want my students to know and be able to do by the end of this unit?
This isn't just about listing standards. It’s about envisioning what mastery actually looks like in your classroom.
This is where you design your summative assessment. It's the final performance, project, or test that lets students show you what they’ve learned. By creating this first, you give yourself a crystal-clear target to aim for throughout the entire unit.
Here’s what this could look like in practice:
- 4th Grade Science: Instead of a multiple-choice test on ecosystems, the summative is a group presentation where students act as "park rangers" proposing a conservation plan for a local habitat.
- 10th Grade U.S. History: Rather than an essay on the causes of the American Revolution, the final assessment is a structured debate where students argue for or against independence, using primary source documents as evidence.
In both cases, the final task requires a much deeper level of understanding than simple memorization. That’s the heart of backward design—it pushes you to plan for authentic learning from the very beginning.
Crafting Student-Friendly Learning Objectives
Once you know your destination (the summative assessment), it's time to map out the major landmarks along the way. These are your learning objectives.
The key here is to write them not for your administrator, but for your students. They should be clear, actionable, and written in language kids can actually understand.
Instead of: "Students will be able to analyze the author's use of figurative language."
Try: "You will be able to find examples of metaphors and similes in a poem and explain how they create a feeling or image for the reader."
When students know exactly what they're supposed to be learning, they become active participants. They can track their own progress and understand why they’re doing each activity.
For more on this, our guide on backward design lesson planning goes even deeper into crafting clear goals.
Connecting Objectives to Your Final Assessment
Now for the magic. Look at your final assessment and break it down. What smaller skills will students need to master to be successful on that final task? Each of those skills becomes a learning objective.
Let's go back to that 4th-grade ecosystems project. To nail that "park ranger" presentation, students will need to:
- Define key vocabulary (ecosystem, habitat, producer, consumer).
- Identify the living and nonliving parts of a local habitat.
- Explain how the parts of the ecosystem depend on each other.
- Research a threat to that habitat.
- Propose a solution in a clear, organized presentation.
Boom. You just outlined the core lessons for your entire unit. Each objective becomes the focus of one or more lessons, ensuring that everything you teach directly builds toward that final goal.
There’s no guesswork and no wasted time. You've created a logical, purposeful path to mastery.
Mapping Your Unit Without Losing Your Mind
You’ve locked in your destination with backward design. Awesome. Now for the part that can feel like assembling a 1,000-piece puzzle where the pieces keep changing shape: sequencing your lessons into a logical flow.
How do you build a journey that moves students from simple to complex without leaving anyone behind?
This is where the real art of planning a unit comes in. You’re not just listing activities; you're scaffolding concepts and creating a coherent narrative where each lesson builds directly on the one before it.
The good news is, backward design already did some of the heavy lifting. You know the end goal (your summative assessment) and the key milestones (your learning objectives). The next step is simply laying out those milestones in an order that actually makes sense for learning.
This flow chart nails it—showing how your objectives should drive your assessments, which in turn shape your day-to-day lessons.
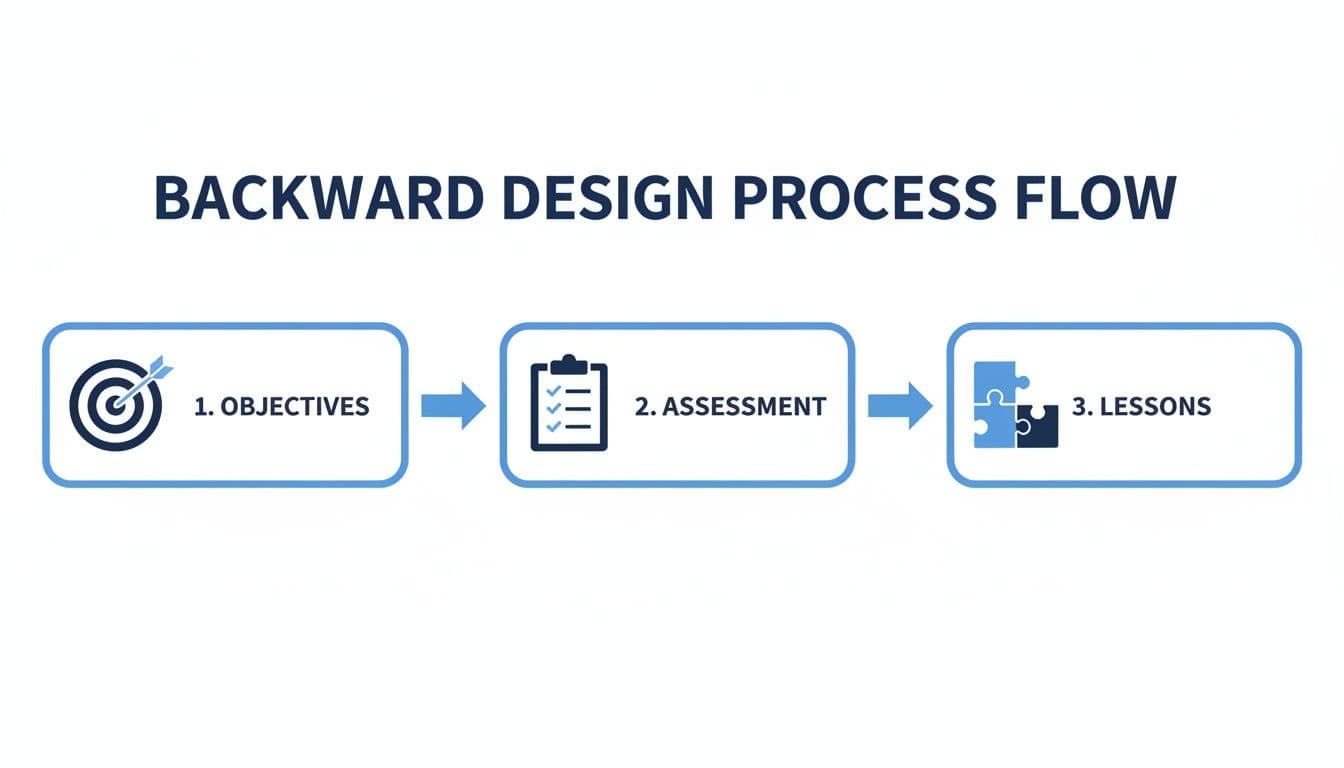
As you can see, everything flows from those learning objectives. This keeps every single lesson and assessment you design purposeful, creating a clear, seamless path for your students.
Strategic Checkpoints for Understanding
One of the biggest mistakes I see is teachers waiting until the big final project to find out who's been lost since day three. To avoid that sinking feeling, you have to pepper your unit map with strategic formative assessments.
Think of them as quick, low-stakes temperature checks. They’re your GPS check-ins on the learning road trip, telling you if you’re on track or if it’s time to reroute.
- Exit Tickets: A single, well-phrased question at the end of class can reveal major misconceptions before they have a chance to take root.
- Quick Polls: A simple thumbs-up/thumbs-down or a fun round of Kahoot! can give you an instant snapshot of the room's understanding.
- Think-Pair-Share: This classic isn't just for engagement. Honestly, just listening in on student conversations is one of the most powerful formative tools you have.
These aren’t for the grade book. They’re for you. They provide the real-time data you need to adjust your instruction on the fly, making sure your unit plan stays a living, responsive guide.
The Perpetual Pacing Problem
Okay, let's talk about the elephant in every teacher's planning room: pacing. You create this beautiful, detailed calendar, and then a fire drill, a surprise assembly, and two snow days completely blow it up. Sound familiar?
The solution isn't a more rigid plan; it's a more flexible one. The secret is to build in buffer days from the very start.
Don't schedule every single day of your unit with brand-new content. Intentionally leave a few days blank on your calendar. These become your designated "flex days" for reteaching, extension activities, or simply catching up.
A good rule of thumb is to build in one flex day for every one to two weeks of instruction. This little bit of breathing room transforms your unit plan from a source of stress into a reliable guide that can withstand the beautiful chaos of school life. If you need more help with this, check out our complete guide on creating a pacing guide template for teachers that builds in exactly this kind of flexibility.
Using AI to Lighten the Load
Let’s be real: mapping standards, sequencing lessons, and building a flexible calendar is incredibly time-consuming. This is where modern tools can be a total game-changer. Teacher adoption of generative AI is exploding, with 83% of K–12 teachers now using AI-powered tools.
But here’s the catch: a massive 71% of teachers report having no formal AI training. Despite this skills gap, when educators use these tools effectively, the payoff is huge. A recent report found that 68% save up to five hours each week—time that can be poured right back into working with students.
Platforms like Kuraplan are designed to do this exact heavy lifting for you. You can plug in your learning objectives, and it will automatically suggest a logical lesson sequence, mapping each one back to the correct standards. It helps you see the entire unit at a glance, making it so much easier to spot gaps and place those crucial formative assessments.
By automating the tedious, structural parts of planning, you free up your brainpower to focus on what you do best: designing creative, high-impact learning experiences for your students.
Differentiation That Works for Every Student

Let’s get one thing straight: differentiation is not about creating thirty different lesson plans for thirty different kids. If that were the case, we’d all burn out by October.
True, sustainable differentiation is about something much smarter—offering multiple pathways for students to learn the same core material. It’s about giving them different ways to take in information, different ways to make sense of it, and different ways to show you what they know.
When you're planning a unit, this flexibility is what transforms a good plan into a great one that actually reaches every learner in your room. The most effective way I've found to do this is by focusing on three areas you can tweak: the content, the process, and the product.
Differentiating the Content
This is all about what students are learning from. A single textbook chapter or a whole-class lecture rarely works for everyone. Differentiating the content simply means providing a variety of resources that teach the same concepts but at different levels of complexity.
It's all about access. You're not changing what they learn, you're just giving them different doors to enter the same room.
Here are some of my go-to strategies that don’t require a ton of extra prep:
- Leveled Texts: For a social studies unit on the American Revolution, I might find three articles on the Boston Tea Party—one written at a 4th-grade reading level, one at grade level, and one that includes some tricky primary source excerpts for my advanced readers.
- Video and Audio Options: Some kids just absorb information better by watching a short documentary clip or listening to a podcast segment. It’s a game-changer compared to making them read dense text.
- Annotated Guides: Sometimes I’ll provide a version of the reading with key vocabulary already defined or with guiding questions in the margins. It helps students focus their attention right where it needs to be.
By simply offering the same information in a few different formats, you’ve already removed major learning barriers for a significant portion of your class. It's one of the highest-impact, lowest-effort moves you can make.
Differentiating the Process
Once students have the content, the next step is the process—the activities they do to actually engage with the material. This is where you can inject a lot of choice and creativity into your unit.
This is the "how they chew on it" part of the lesson. Not every student learns by sitting still and filling out a worksheet.
For instance, after a math lesson on calculating area, I might offer a choice board with different ways to practice the skill:
- The Architect: Design a floor plan for a dream classroom, calculating the area of each section.
- The Gamer: Complete a set of challenge problems on a digital platform like Blooket or IXL.
- The Artist: Create a mosaic using different colored squares and calculate the total area of each color.
- The Traditionalist: Complete a set of practice problems from the textbook.
Every student is practicing the exact same skill—calculating area—but they get to choose the method that best suits their learning style. This small shift gives them ownership and dramatically increases engagement.
Differentiating the Product
Finally, we have the product. This is just how students demonstrate what they’ve learned at the end of a lesson or unit. A traditional essay or a multiple-choice test is just one way to measure understanding, and it doesn't always capture what every student truly knows.
Offering choice in the final product can be a game-changer, especially for students who freeze up during traditional tests.
For a history unit on ancient Egypt, instead of a standard test, I might let students choose one of the following to show their mastery:
- Write a research report about a specific pharaoh.
- Create a detailed, historically accurate diorama of a tomb.
- Record a short "documentary" podcast explaining the mummification process.
- Design a travel brochure inviting tourists to visit ancient Egypt's landmarks.
Each option requires students to use the same core knowledge from the unit, but it lets them showcase their learning through their strengths—whether that's writing, building, speaking, or visual design.
This is another area where technology can make a huge difference in the planning a unit phase. AI-powered platforms like Kuraplan can instantly generate differentiated materials based on your unit goals. You can ask it to create three versions of a worksheet at different reading levels or to suggest scaffolding questions for a complex topic. It takes the heavy lifting out of creating multiple resources, ensuring every student has a meaningful way to engage.
Creating and Curating Your Unit Materials
You’ve mapped out the journey and sequenced the lessons. Now for the fun part: gathering the gear. This is where you pull together the worksheets, slides, visuals, and hands-on activities that bring your unit to life.
This is the nuts-and-bolts stage of planning a unit. It’s where your big ideas become the tangible resources your students will actually work with every day.
The Buy, Borrow, or Build Philosophy
Every teacher knows the late-night scramble for that one perfect resource. Before you fall down that rabbit hole again, try thinking about it with a simple philosophy I’ve used for years: buy, borrow, or build.
- Buy: Sometimes, a high-quality, pre-made resource just fits perfectly. If you have the budget and you're short on time, this is a smart move.
- Borrow (or Adapt): This is classic teacher territory. You find a great worksheet from a colleague or an activity online, and then you tweak it just enough to match your students' needs. It's efficient and effective.
- Build: Then there are times when nothing out there is quite right. That's when you roll up your sleeves and create something from scratch—a custom diagram, a specific project rubric, or a tailored set of practice problems for your kids.
The secret is knowing which to choose and when. Trying to build everything yourself is a direct path to burnout, but only using pre-made stuff can feel impersonal and disconnected from your students. A healthy mix is key.
Designing Materials That Actually Work
When you do decide to build, remember this: clarity and purpose always beat flashy design. A simple, effective worksheet is way better than a confusing one that just looks pretty.
Focus on creating materials that directly support your learning goals. For example, a diagram you make of cellular respiration showing only the key stages you’re teaching is infinitely more powerful than some generic, overly complex textbook image that just overwhelms students.
This is where custom visuals are a game-changer. A kid-friendly illustration you sketch out for a historical event or a simple graphic organizer for a tough text can be the very thing that makes the concept finally click for a student.
Meeting the Demands of the Modern Classroom
Let’s be real—the pressure to create high-quality, versatile materials is higher than ever. The global K–12 education market is expected to hit $732.94 billion by 2034, a huge jump driven by AI tools and cloud-based platforms like Google Classroom. With more schools using hybrid models and over 13,500 international schools worldwide, our unit plans have to be flexible enough for all kinds of learners. You can dig into the numbers in this recent K–12 education market research.
This is where modern tools can be an absolute lifeline. You shouldn't have to spend hours wrestling with formatting or hunting for the right image. The right platform can do the tedious work for you, giving you back precious time to actually teach.
For this, I lean on smart tools. A platform like Kuraplan can instantly generate custom diagrams, kid-friendly illustrations, and printable worksheets right from your lesson. It completely cuts out the frustrating formatting and gives you high-quality, relevant materials in minutes. It's a lifesaver when you're deep in the planning a unit process.
If you’re curious about this, our article on how to create unit plans using AI has a lot more practical advice.
Curating a Digital and Physical Resource Bank
Finally, as you buy, borrow, and build, be smart about organizing everything for the future. You are your own best resource, and the work you do now will pay you back tenfold next year.
Tips for Organizing Your Unit Materials:
- Create a Digital Folder System: Make a main folder for each unit. Inside, have subfolders for "Lesson Plans," "Worksheets," "Slides," "Assessments," and "Visuals." A little organization now prevents a massive headache later.
- Use Consistent Naming Conventions: Give your files clear names. "Unit 3 American Revolution Lesson 4 Boston Tea Party Worksheet" is so much better than "Worksheet12.docx."
- Keep a "Notes for Next Year" Doc: Inside each unit folder, start a running document. Jot down quick notes as you teach. What worked? What bombed? Which resource needs a little tweak? Trust me, this is a gift to your future self.
When you thoughtfully create and curate your materials, you’re not just planning for this group of students. You’re building a library of proven resources that will make your job easier and more effective every single time you teach the unit.
How to Reflect, Revise, and Collaborate
A unit plan is never truly ‘finished.’ Let’s be real, the best ones are living documents that we tweak and adjust based on what actually happens in the organised chaos of a classroom. This final piece of the puzzle—reflection and revision—is what turns a pretty good unit into a fantastic one for next year.
It’s all about taking a breath after the dust settles to ask the right questions. What totally rocked? Which lessons were a complete flop? Where did the kids just get it, and where did you hear crickets? Scribbling notes directly on your plan as you go is a gift to your future self.
Think of it like a coach reviewing game tape. You aren't just looking at the final score (the summative test); you're analyzing every play that led to it. A quick "Note for Next Year: The fishbowl on Chapter 4 was a mess—try a jigsaw instead" is pure gold.
The Power of Planning Together
You don't have to figure this all out alone. Your grade-level team or department is your secret weapon. Planning together doesn't just lighten the load; it sparks new ideas and creates a more consistent experience for students as they move from class to class.
When one teacher finds an amazing video that finally makes a tricky concept click, or another creates a killer review game, sharing those resources makes everyone’s job easier. That kind of teamwork is more important now than ever.
Smart Planning in an Era of Tight Budgets
The reality is that K–12 districts everywhere are facing serious budget constraints, forcing schools to get creative with how they spend their money. There's a near-universal agreement among school leaders that limited funding makes it harder to support student learning.
This pressure is pushing schools to be more selective, choosing tools that actually save instructional time over collecting a bunch of programs that do the same thing. Find out more about how K–12 leaders are adapting to these trends.
This is exactly where collaborative planning and the right tools become non-negotiable. By working as a team and using platforms that handle the most time-consuming parts of the process, we can do more with less. For example, a tool like Kuraplan can help a whole team co-plan units, share differentiated materials, and lock in standards alignment without each teacher having to reinvent the wheel.
When we prioritize strategies that save us time and stretch our resources, our planning becomes not only more effective for our students but also more responsible and sustainable for our schools.
A Few Common Questions About Unit Planning
Let's dig into some of the questions I hear most often from other teachers when it comes to planning a new unit. Nailing down these basics can make the whole process feel less overwhelming.
How Long Should a Unit Even Be?
There’s no single right answer, but a good rule of thumb is somewhere between two and six weeks. That’s usually the sweet spot for digging deep into a topic without your students getting burned out.
Think of it this way: a shorter, two-week unit might be perfect for a specific math concept like fractions, while a longer six-week one is better suited for a full novel study or a major historical period. The key is to let your learning goals dictate the timeline, not the other way around.
Unit Plan vs. Lesson Plan: What's the Difference?
I like to think of a unit plan as the entire road trip itinerary. It shows the final destination (the learning goals), the major stops along the way (the key concepts and assessments), and the general route you'll take.
A lesson plan, on the other hand, is the turn-by-turn GPS for a single day of that trip. It gets into the nitty-gritty of the specific activities, materials, and discussions for one class period.
Your unit plan gives you the 'what' and 'why' for the entire learning journey. The lesson plans handle the 'how' for each individual step.
Seriously, How Can I Find the Time for All This?
This is the big one, right? The honest answer is you have to work smarter, not harder. My first piece of advice is always to team up. Grab your grade-level colleagues and divide the workload—don't reinvent the wheel by yourself.
Secondly, let technology do some of the heavy lifting. Smart AI tools built just for teachers, like Kuraplan, can generate a standards-aligned unit outline, create differentiated materials, and even sequence your lessons in a few minutes. It can genuinely give you hours of your weekend back.
Ready to stop spending your weekends planning? Kuraplan can help you build complete, standards-aligned units in minutes, not hours. Try Kuraplan for free and see how it works.