EnglishFreePrintable

Visual Storytelling Techniques

A free english worksheet ready for your classroom. Open in Kuraplan to grab the print-ready PDF, customize it for your students, or generate a fresh version in seconds.
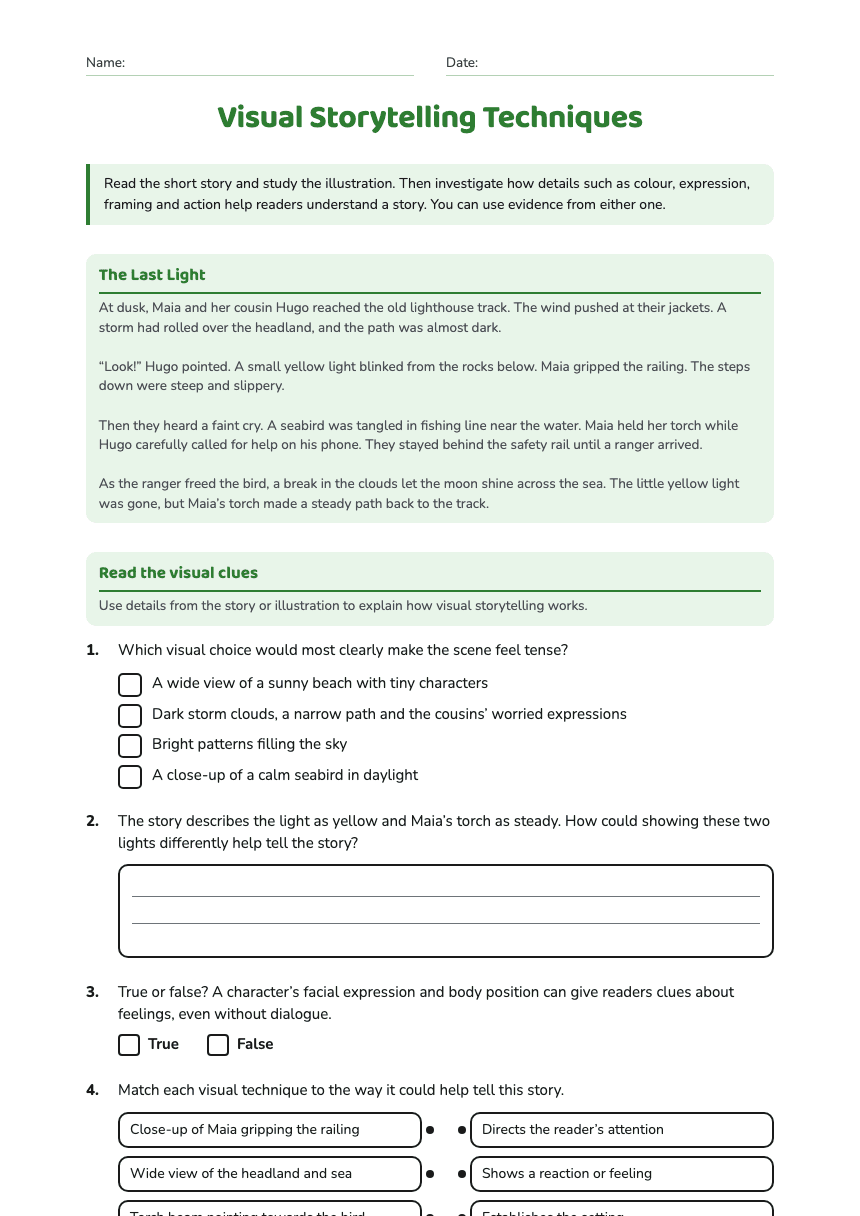
Visual Storytelling Techniques worksheet preview
Name:Date:

Visual Storytelling Techniques

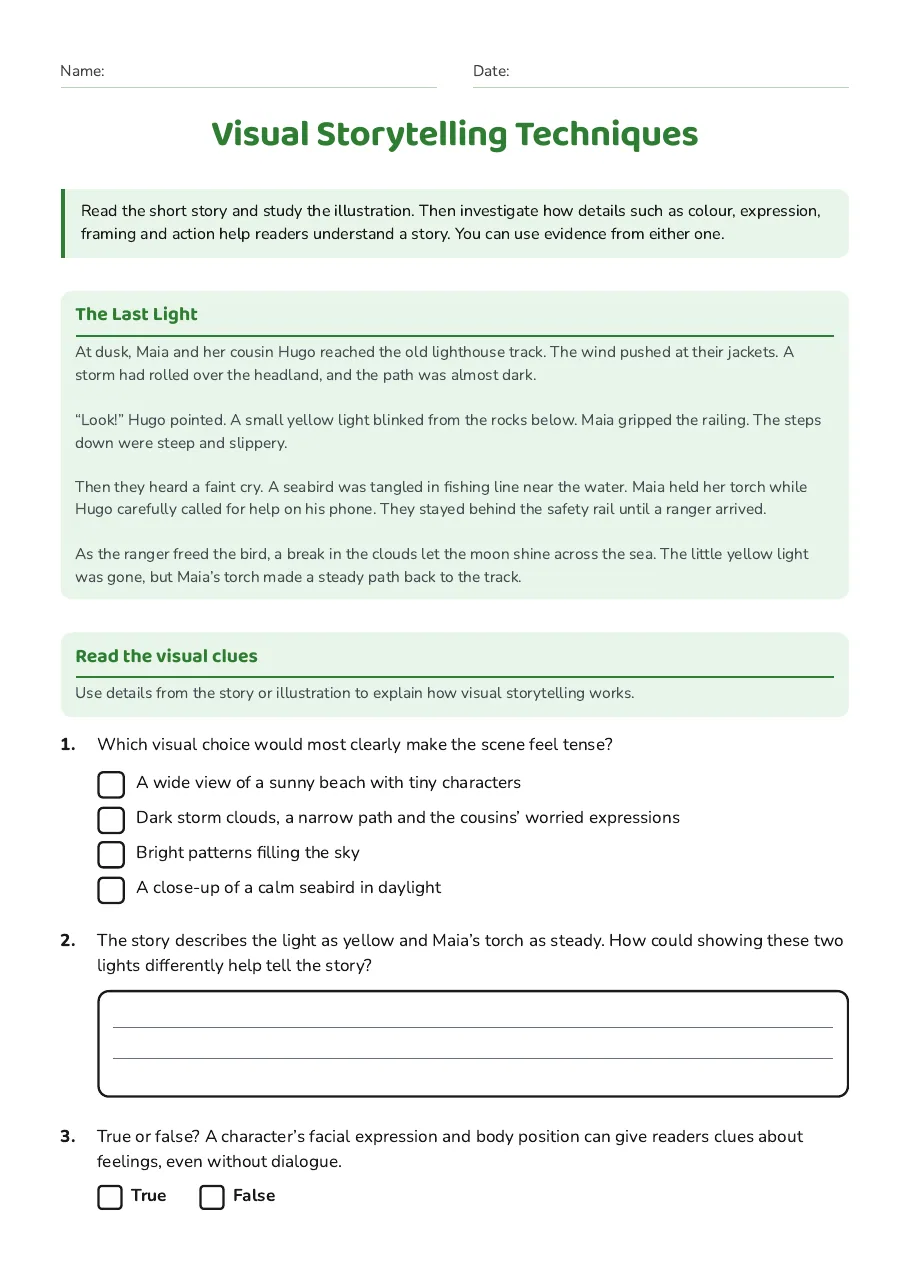
Read the short story and study the illustration. Then investigate how details such as colour, expression, framing and action help readers understand a story. You can use evidence from either one.

The Last Light

At dusk, Maia and her cousin Hugo reached the old lighthouse track. The wind pushed at their jackets. A storm had rolled over the headland, and the path was almost dark. “Look!” Hugo pointed. A small yellow light blinked from the rocks below. Maia gripped the railing. The steps down were steep and slippery. Then they heard a faint cry. A seabird was tangled in fishing line near the water. Maia held her torch while Hugo carefully called for help on his phone. They stayed behind the safety rail until a ranger arrived. As the ranger freed the bird, a break in the clouds let the moon shine across the sea. The little yellow light was gone, but Maia’s torch made a steady path back to the track.

Read the visual clues

Use details from the story or illustration to explain how visual storytelling works.

1.Which visual choice would most clearly make the scene feel tense?
  • A wide view of a sunny beach with tiny characters
  • Dark storm clouds, a narrow path and the cousins’ worried expressions
  • Bright patterns filling the sky
  • A close-up of a calm seabird in daylight
2.The story describes the light as yellow and Maia’s torch as steady. How could showing these two lights differently help tell the story?
3.True or false? A character’s facial expression and body position can give readers clues about feelings, even without dialogue.
TrueFalse
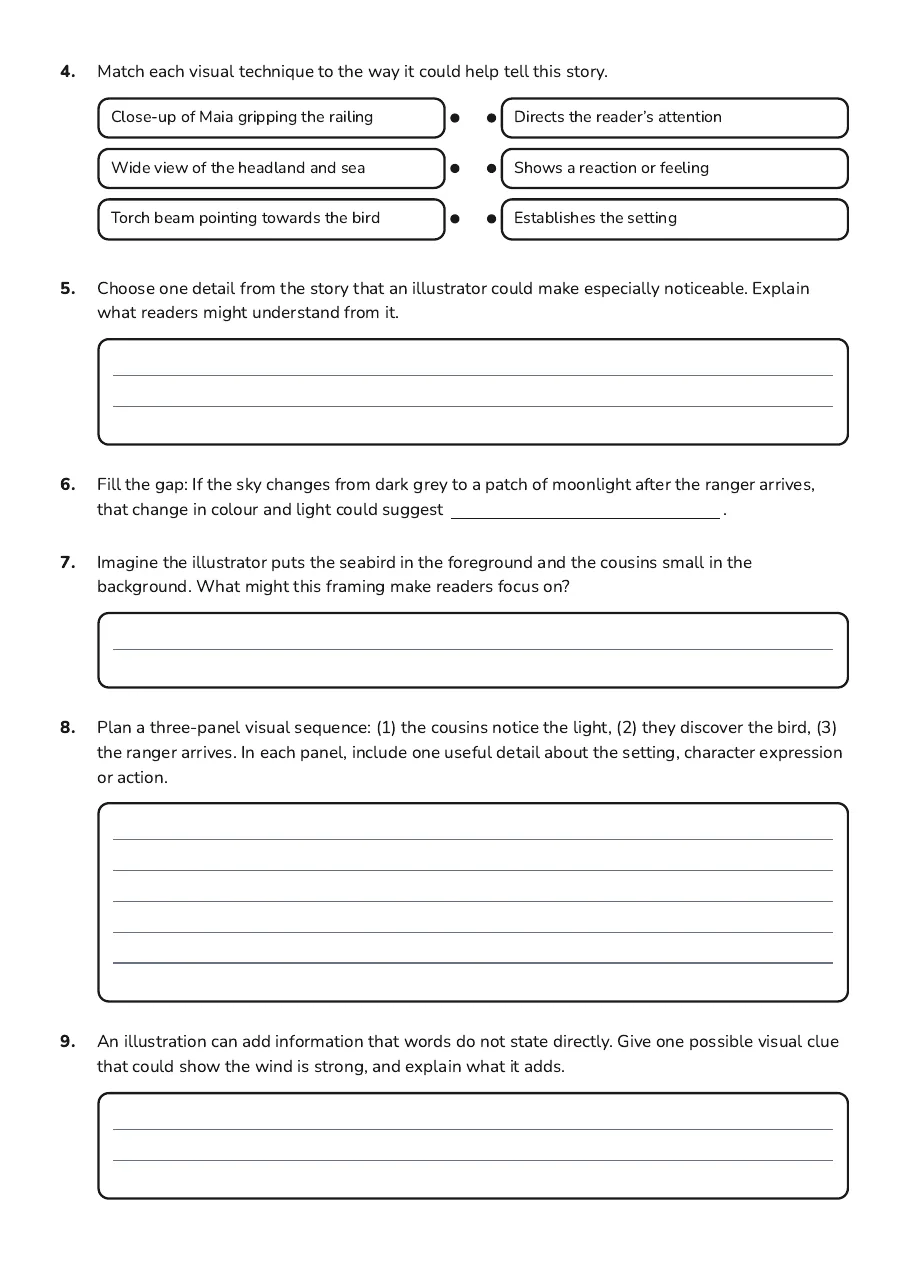
4.Match each visual technique to the way it could help tell this story.
  • Close-up of Maia gripping the railing
  • Wide view of the headland and sea
  • Torch beam pointing towards the bird
  • Directs the reader’s attention
  • Shows a reaction or feeling
  • Establishes the setting
5.Choose one detail from the story that an illustrator could make especially noticeable. Explain what readers might understand from it.
6.Fill the gap: If the sky changes from dark grey to a patch of moonlight after the ranger arrives, that change in colour and light could suggest .
7.Imagine the illustrator puts the seabird in the foreground and the cousins small in the background. What might this framing make readers focus on?
8.Plan a three-panel visual sequence: (1) the cousins notice the light, (2) they discover the bird, (3) the ranger arrives. In each panel, include one useful detail about the setting, character expression or action.
9.An illustration can add information that words do not state directly. Give one possible visual clue that could show the wind is strong, and explain what it adds.
Draw one moment from “The Last Light”. Use a clear focal point and at least two visual clues to show mood or action. Add labels explaining your choices.

3 printable pages

  • Visual Storytelling Techniques, page 1 of 3: The Last Light, Read the visual clues

    Page 1

  • Visual Storytelling Techniques, page 2 of 3: 4. Match each visual technique to the way it could help tell this story.

    Page 2

  • Visual Storytelling Techniques, page 3 of 3: The Last Light

    Page 3

About This Worksheet

Free in Kuraplan

Sign up free, grab the PDF, and customize it for your class.

Print-Ready

Formatted for standard paper. Clean layout, easy to read.

AI-Generated

Created with Kuraplan's AI, designed for real classroom use.

For Teachers & Parents

Use in classrooms, for homework, tutoring, or homeschool.

Need a custom version of this worksheet?

Kuraplan's AI generates custom worksheets in seconds — differentiated for every learner, aligned to your curriculum.

Generate Custom Worksheets — Free
No credit card Curriculum-aligned Under 60 seconds